JPA toy project
Project Setting
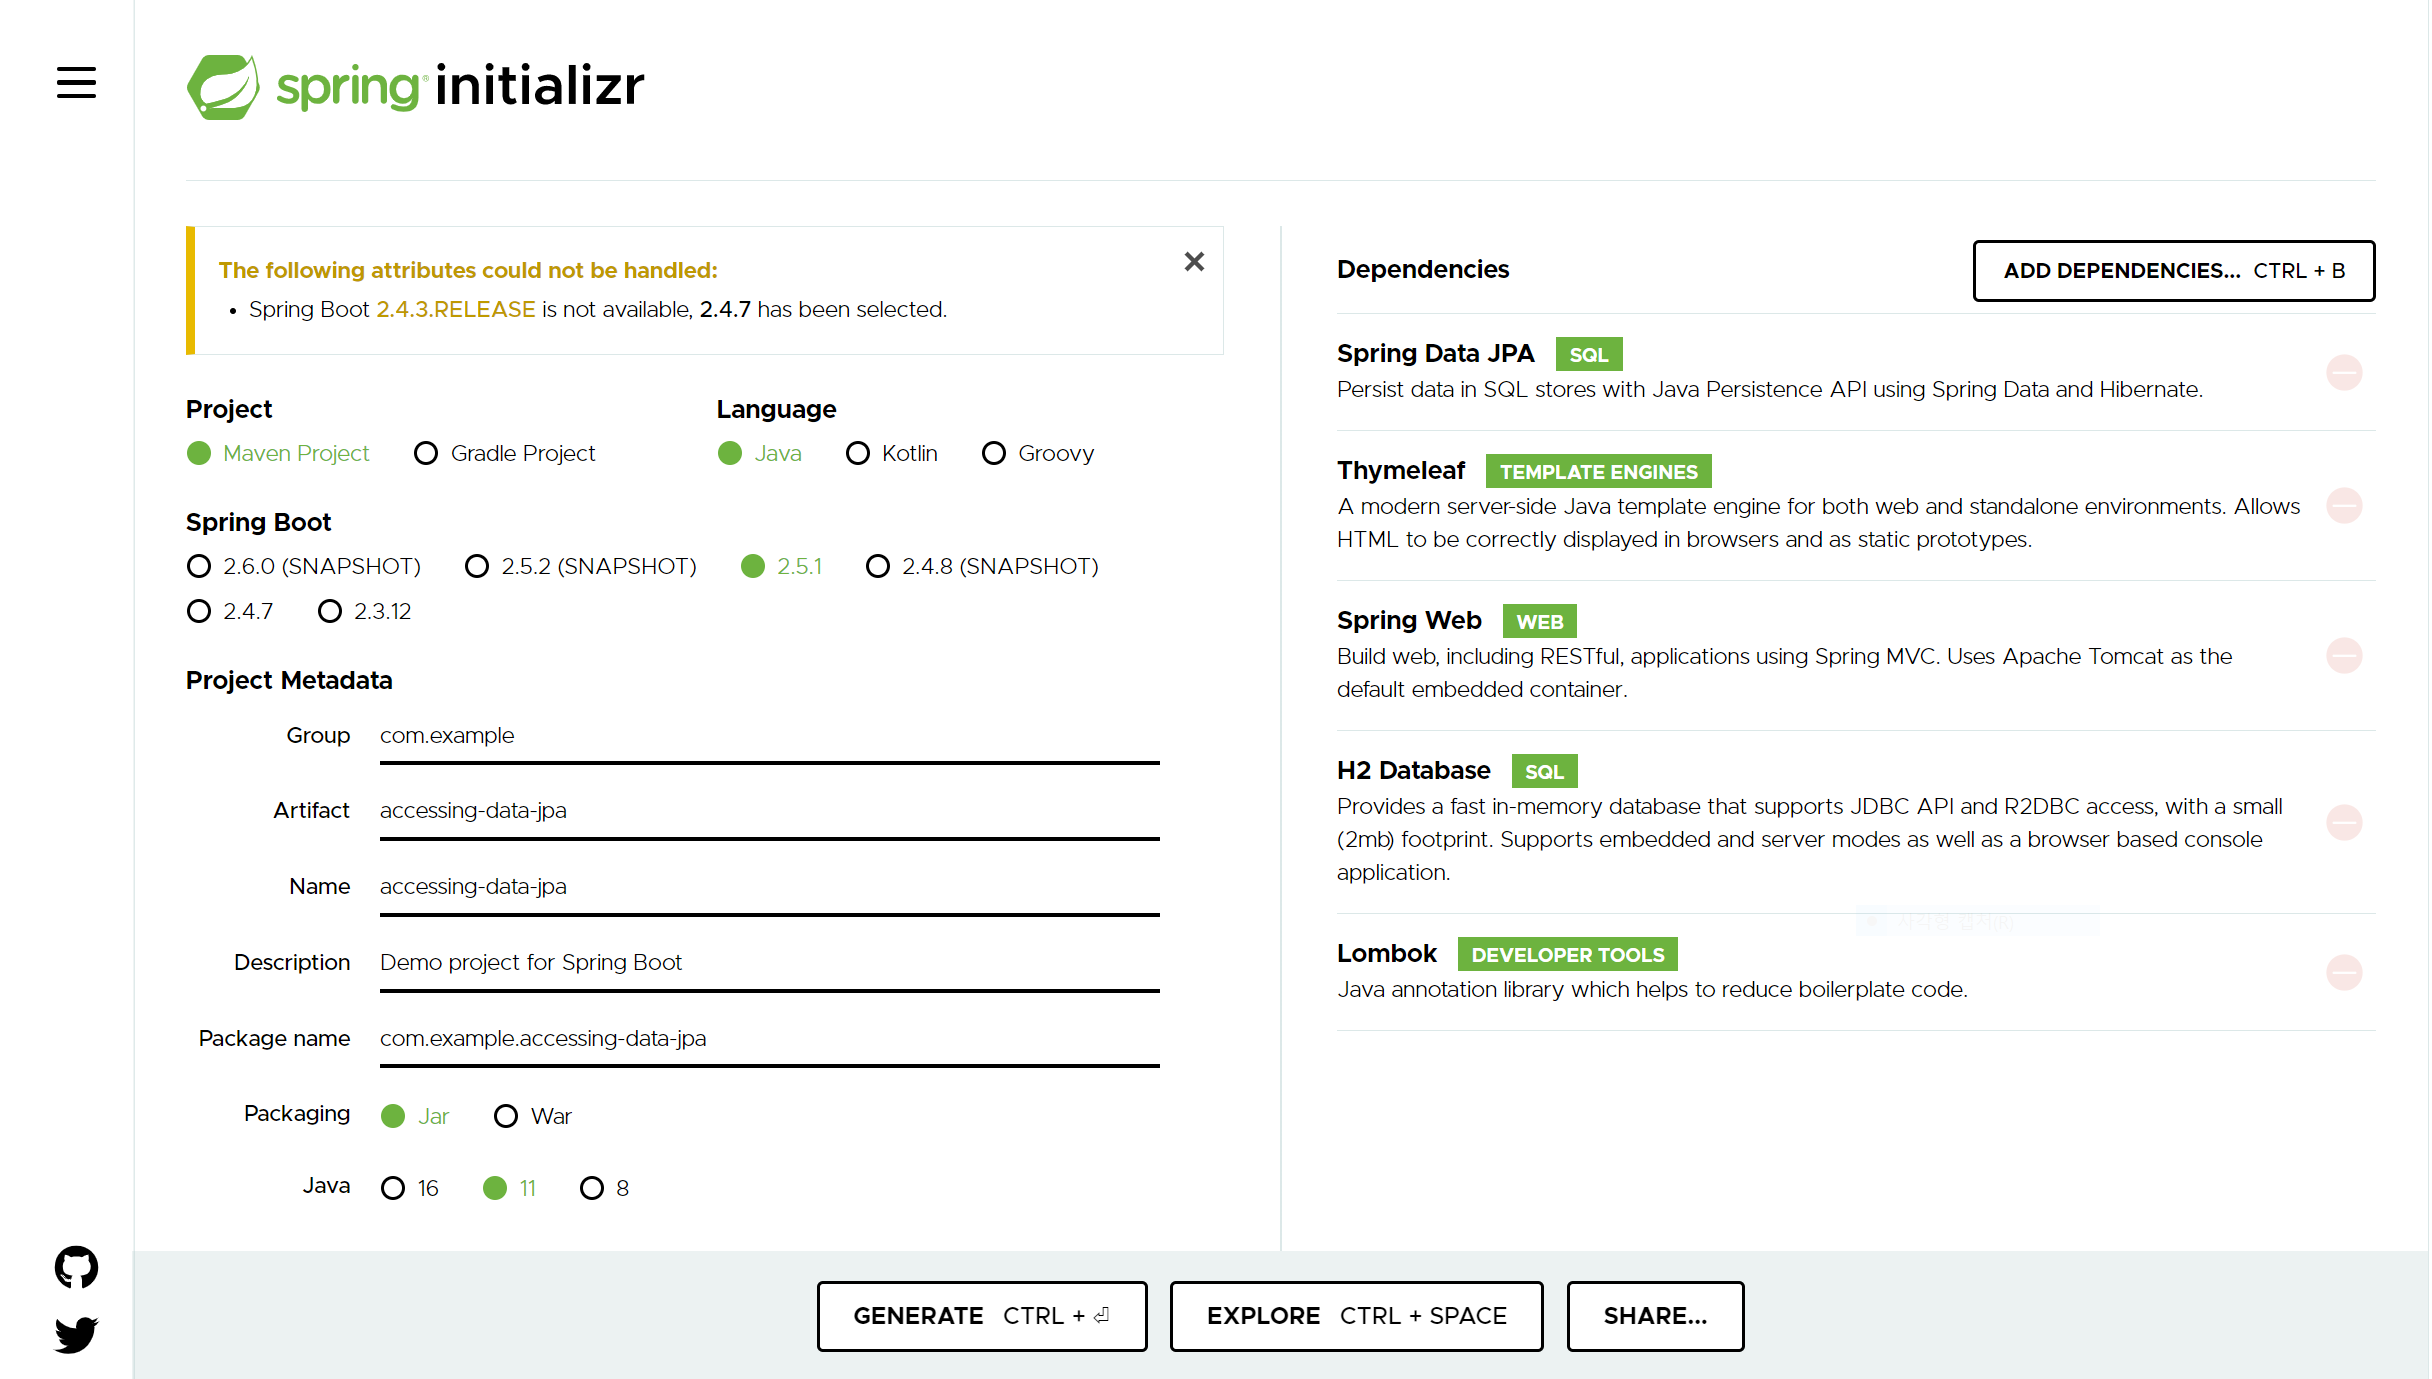
- spring-boot 2.5.0
- java 11 (jdk-11.0.10)
- dependency
- spring data jpa
- thymeleaf
- spring web
- h2 database
- lombok
- IntelliJ IDEA
😊 start!
1. https://start.spring.io/ 에서 Java 11 선택 후 위의 Dependencies를 선택한다.

2. pom.xml 설정 확인
😊pom.xml
<?xml version="1.0" encoding="UTF-8"?>
<project xmlns="http://maven.apache.org/POM/4.0.0" xmlns:xsi="http://www.w3.org/2001/XMLSchema-instance"
         xsi:schemaLocation="http://maven.apache.org/POM/4.0.0 https://maven.apache.org/xsd/maven-4.0.0.xsd">
    <modelVersion>4.0.0</modelVersion>
    <parent>
        <groupId>org.springframework.boot</groupId>
        <artifactId>spring-boot-starter-parent</artifactId>
        <version>2.5.0</version>
        <relativePath/> <!-- lookup parent from repository -->
    </parent>
    <groupId>com.test</groupId>
    <artifactId>toyproject1</artifactId>
    <version>0.0.1-SNAPSHOT</version>
    <name>toyproject1</name>
    <description>Demo project for Spring Boot</description>
    <properties>
        <java.version>11</java.version>
    </properties>
    <dependencies>
        <dependency>
            <groupId>org.springframework.boot</groupId>
            <artifactId>spring-boot-starter-actuator</artifactId>
        </dependency>
        <dependency>
            <groupId>org.springframework.boot</groupId>
            <artifactId>spring-boot-starter-data-jpa</artifactId>
        </dependency>
        <dependency>
            <groupId>org.springframework.boot</groupId>
            <artifactId>spring-boot-starter-thymeleaf</artifactId>
        </dependency>
        <dependency>
            <groupId>org.springframework.boot</groupId>
            <artifactId>spring-boot-starter-web</artifactId>
        </dependency>
        <dependency>
            <groupId>org.springframework.boot</groupId>
            <artifactId>spring-boot-starter-jdbc</artifactId>
        </dependency>

        <dependency>
            <groupId>com.h2database</groupId>
            <artifactId>h2</artifactId>
        </dependency>
        <dependency>
            <groupId>org.mariadb.jdbc</groupId>
            <artifactId>mariadb-java-client</artifactId>
        </dependency>
        <!-- https://mvnrepository.com/artifact/org.springframework.boot/spring-boot-devtools -->
        <dependency>
            <groupId>org.springframework.boot</groupId>
            <artifactId>spring-boot-devtools</artifactId>
        </dependency>

        <dependency>
            <groupId>org.projectlombok</groupId>
            <artifactId>lombok</artifactId>
            <optional>true</optional>
        </dependency>
        <dependency>
            <groupId>org.springframework.boot</groupId>
            <artifactId>spring-boot-starter-tomcat</artifactId>
        </dependency>
        <dependency>
            <groupId>org.springframework.boot</groupId>
            <artifactId>spring-boot-starter-test</artifactId>
            <scope>test</scope>
        </dependency>
    </dependencies>

    <build>
        <plugins>
            <plugin>
                <groupId>org.springframework.boot</groupId>
                <artifactId>spring-boot-maven-plugin</artifactId>
                <configuration>
                    <excludes>
                        <exclude>
                            <groupId>org.projectlombok</groupId>
                            <artifactId>lombok</artifactId>
                        </exclude>
                    </excludes>
                </configuration>
            </plugin>
        </plugins>
    </build>

</project>
3. src/main/resources 밑에 application.properties 파일 생성
😊application.properties
# spring datasource
spring.datasource.driver-class-name=org.h2.Driver
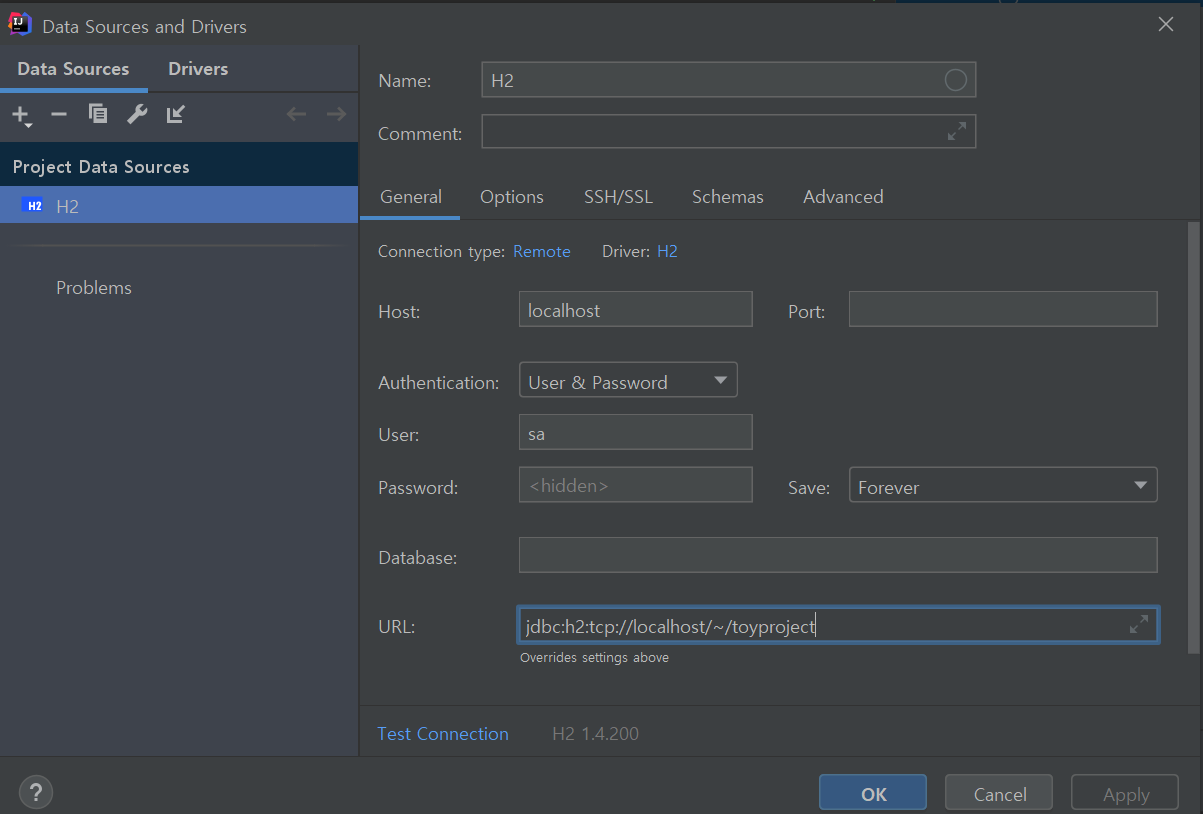
spring.datasource.url=jdbc:h2:tcp://localhost/~/toyproject
spring.datasource.username=sa
spring.datasource.password=


# H2 설정
spring.h2.console.enabled=true
spring.h2.console.path=/h2

# jpa
spring.jpa.hibernate.ddl-auto=create
spring.jpa.properties.hibernate.format_sql=true
spring.jpa.properties.hibernate.use_sql_comments=true
spring.jpa.hibernate.use-new-id-generator-mappings=true

#log
logging.level.org.hibernate.SQL=debug

# 기본 포트번호 변경
server.port=8181

# Thymeleaf 설정
spring.thymeleaf.cache=false
spring.devtools.restart.enabled=true
spring.devtools.livereload.enabled=true
4. h2 서버 구동 후 확인하면 실행이 된다.
Reference
ERROR CODE
-
h2 Database may be already in use: null ••• h2에서 8080포트를 쓰는데 springboot 내장 톰캣도 8080포트를 써서 에러 해결방법 → application.properties 에서 server.port=8181로 톰캣 서버 변경
-
A file path that is implicitly relative to the current working directory is not allowed in the database URL “jdbc:h2:tcp://localhost:9092/toyproject”. Use an absolute path, ~/name, ./name, or the baseDir setting instead. [90011-200].
intellij와 h2 db 연동 실패
해결방법 → java bean 만들고 h2정보의 url을 ~/ 이나 ./으로 해야 한다.
@Configuration
public class H2ServerConfig {

    @Bean
    public Server h2DatabaseServer() throws SQLException {
        return Server.createTcpServer().start();
    }
}


댓글남기기